

If you’ve ever had to stop the car, get out, wrestle with a heavy gate, climb back in, drive through, and then do it all over again to close it, well, you know how annoying it gets. Now add rain, mud, or a car full of kids into the mix, and suddenly it feels like a workout you didn’t sign up for. That’s why so many property owners are switching to solar gate openers.
A solar-powered opener means you can sit comfortably in your vehicle, press a button, and the gate swings or slides open on its own. No cables to run underground, no electricians charging you a fortune, and no worrying when the power goes out. Sounds great, right? But how tricky is it to set one up?
The truth is, most solar gate opener kits are designed for DIY installation. With some basic tools and a free afternoon, you can get the job done. Let’s walk through it step by step.
Why Choose Solar in the First Place?
Before diving into the nuts and bolts, it’s worth asking: why solar? Rural properties often have gates far from the house or the nearest power source. Running cables across paddocks or driveways is expensive and messy. Solar solves the problem neatly. A small panel charges a battery, the battery powers the opener, and as long as the sun comes up each day, your gate is good to go.
There’s also the peace of mind. Even if your area has a blackout, your gate still works. Plus, you’re tapping into free, renewable energy, which just feels good.
What You’ll Need
Every kit comes with slightly different parts, but here’s a general list of what you’ll want on hand before starting:
-
The gate opener kit (motor arms, control box, solar panel, battery, and remotes).
-
Drill with the right bits.
-
Screwdrivers, spanners, and a level.
-
Measuring tape.
-
Safety gear like gloves and glasses.
-
A gate in decent condition, if the hinges are rusty or the frame sags, fix that first.
Step 1: Check the Gate
This might sound obvious, but you’d be surprised how many people skip it. If your gate is stiff or doesn’t swing smoothly, the opener will struggle. Push it by hand first. If it creaks, drags, or feels heavy, grease the hinges or replace worn hardware. A solar opener is strong, but it’s not magic it works best with a gate that moves freely.
Step 2: Plan Before You Drill
Every property is different. Some people have single gates, others have double. Some gates swing inward, others outward. Spend a few minutes planning the layout. Decide where the control box will go, and figure out the best spot for the solar panel. It needs direct sunlight, not shade from trees or sheds.
Lay out all the parts on the ground so you can picture how everything connects. Trust me, this saves headaches later.
Step 3: Mount the Motor Arms
 The arms are what actually move the gate. Use the brackets from your kit and attach them to both the gatepost and the gate itself. Make sure everything is straight and level before tightening the bolts. If it’s crooked, the motor will strain and wear out faster.
Once the brackets are in place, attach the motor arms. Don’t power them up yet; you’re just getting the hardware installed.
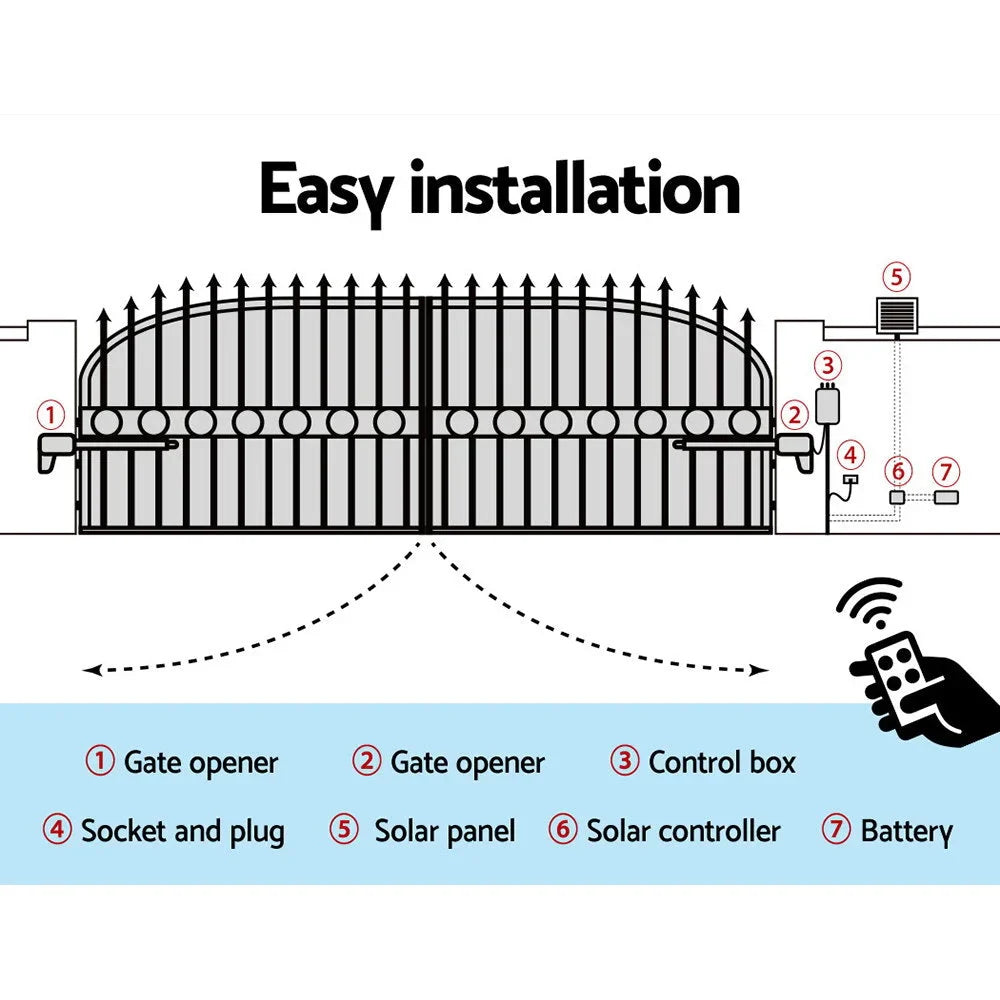
Step 4: Install the Control Box and Battery
Think of the control box as the brain. It usually mounts on the inside of your gatepost in a weather-protected spot. Inside, you’ll place the battery that the solar panel will charge. Most kits make the wiring pretty straightforward: colour-coded leads, clear diagrams, and labelled ports. Connect the motor arms to the control box with the provided cables.
Step 5: Position the Solar Panel
This part matters. The panel needs sun exposure to keep the battery charged. If your gatepost faces the wrong way, mount the panel on a nearby pole or fence. Angle it toward the sun—north-facing in the southern hemisphere, south-facing in the northern hemisphere. Secure it tightly so the wind won’t shake it loose. Then run the cable neatly back to the control box.
Step 6: Add Safety Features
Most modern kits include safety sensors that stop the gate if something is in the way. Install these across from each other at ground level on either side of the gate. It’s an extra layer of security, especially if you’ve got kids, pets, or livestock that like to wander near the gate.
This is also the stage where you’d install extras like a keypad or intercom, if your kit comes with one.
Step 7: Test the System
Now comes the fun part. Connect the battery, check that the solar panel is charging, and grab the remote. Press the button and watch the gate move. It should swing smoothly and stop exactly where it’s supposed to if it doesn’t, adjust the limit settings in the control box.
Test it several times, including the safety sensors. Wave your hand in front of the beam as it closes; it should stop and reverse immediately.
Step 8: Tidy Up and Secure
Once everything works, go back and tidy the installation. Clip cables neatly out of the way, tighten every bolt, and check the brackets again. If your property sees harsh weather, consider adding a waterproof cover to the control box. It’s a small step that extends the life of your setup.
Common Mistakes People Make
-
Putting the solar panel in a shady spot. Even partial shade cuts efficiency.
-
Installing on a gate that already drags. The motor will wear out quickly.
-
Forgetting to check weight ratings. Always make sure your opener matches the size of your gate.
-
Leaving wires exposed. They’ll get damaged by animals, weather, or everyday wear.
Everyday Life With a Solar Gate Opener
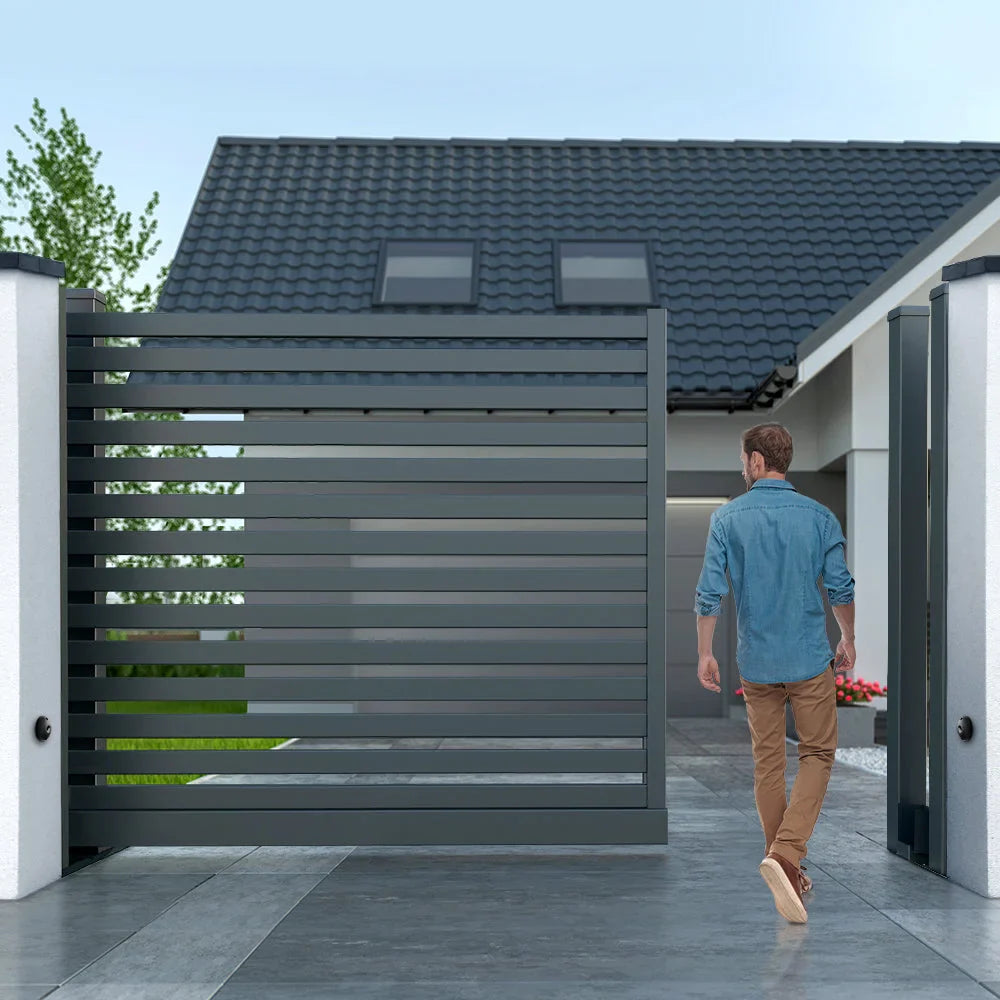 Once it’s installed, the difference is obvious. You roll up in your car, press the button, and drive through without leaving the seat. If it’s raining, you stay dry. If you’re hauling hay or supplies, you don’t have to climb in and out repeatedly.
It’s also safer. You can close the gate behind you right away, which keeps animals where they belong and stops strangers from wandering in. Families love them too; kids can use a keypad instead of wrestling with a heavy latch.
And perhaps the best part: it works even during power cuts, thanks to the solar-charged battery.
Maintenance Tips
Solar gate openers don’t demand much, but a little care keeps them running smoothly. Wipe the solar panel every now and then to clear dust or bird droppings. Lubricate the gate hinges so the motor doesn’t strain. Check the battery once a year; it usually lasts three to five years before needing a replacement. And give the brackets and bolts a quick once-over every few months to make sure nothing has loosened.
Why I Recommend HomeMyGarden Kits
There are plenty of solar gate opener kits out there, but not all are built for rough conditions. Some are fine for lightweight residential gates, but if you’ve got a heavy farm or driveway gate, you need something sturdier. HomeMyGarden’s kits are built with durability in mind. The motors are strong, the solar panels are reliable, and the hardware can handle outdoor life.
I like that they offer both single and double-gate kits, so no matter your setup, you’ll find something that works. And because they’re solar-powered, you’re not adding to your electricity bills or dealing with complicated trenching.
Final Thoughts
Installing a solar gate opener isn’t rocket science. With a good kit, some basic tools, and a bit of planning, most people can handle it themselves. The payoff is huge: less hassle, more security, and a gate that finally works for you instead of against you.
So if you’re tired of jumping in and out of the car to deal with gates, consider making the switch. Once you try it, you’ll wonder how you ever managed without one. And with solar doing the heavy lifting, it’s not just convenient,it’s smart, sustainable, and built for the long run.


