
Anyone who spends time outdoors knows how quickly the backyard gets messy. One day it looks like a magazine spread; the next, there are cushions lying in the sun, kids’ toys on the deck, and gardening gloves tossed wherever you dropped them last. I used to drag everything back inside at the end of the day, which meant endless trips through the house carrying armloads of “stuff.” Then it hit me, what if the seating doubled as storage? That’s when I decided to try making my own outdoor bench seat with storage.
It turned out to be one of the most useful little projects I've ever done in my Australian backyard. It wasn't fancy carpentry, more like building a sturdy box with a lid, but the payoff was huge. Now, whenever I tidy up outside, everything goes into the bench, the lid shuts, and the space looks instantly calmer. If you've been thinking about an outdoor bench seat with storage DIY project for your Australian home, let me walk you through how I did mine and what I learned along the way.
Why Make It Yourself Instead of Buying One?
Sure, you can buy a ready-made bench. I looked at plenty. The problem was always the same: the nice-looking wooden ones were pricey, and the cheaper plastic versions felt flimsy. More importantly, none of them really fit the awkward corner of my deck where I wanted to put it.
Building my own meant I got to choose the exact length, depth, and height. I also picked timber that matched the other furniture I already had. And, let’s be honest, there’s a certain satisfaction in sitting down on something you built with your own hands. Every time I open the lid to grab a cushion or a ball, I get a little reminder: yep, I made this.
Planning: Don’t Skip This Part
Before you even think about sawing wood, grab a tape measure. I walked around my outdoor area with a notebook, sat on existing chairs to check the comfortable seat height, and roughly measured the space where the bench would go. Standard height for seating is around 45 cm, so that’s a good place to start. Depth is usually about the same. For length, you can go short for a balcony or stretch it long enough to seat three or four people if you’ve got the room.
Sketching helps too. I’m no artist, but even a rectangle with scribbled notes was enough to guide me. The main thing to remember: it’s basically a box with a hinged lid. Once you think of it that way, the design feels much less intimidating.
Materials: Keep It Simple
Here’s what I used:
-
Exterior-grade plywood for the panels.
-
A few lengths of treated pine for the frame.
-
Outdoor screws (don’t skimp here; rust-proof is a must).
-
Two heavy-duty hinges.
-
Sandpaper, filler, and outdoor paint.
That’s it. No exotic tools, just the usual suspects: a drill, saw, tape measure, and a square to keep corners straight. If you want to get fancy, you can add soft-close hinges, struts to hold the lid open, or handles for easier lifting, but those are extras, not essentials.
The Build: Where the Storage Bench Gets Real
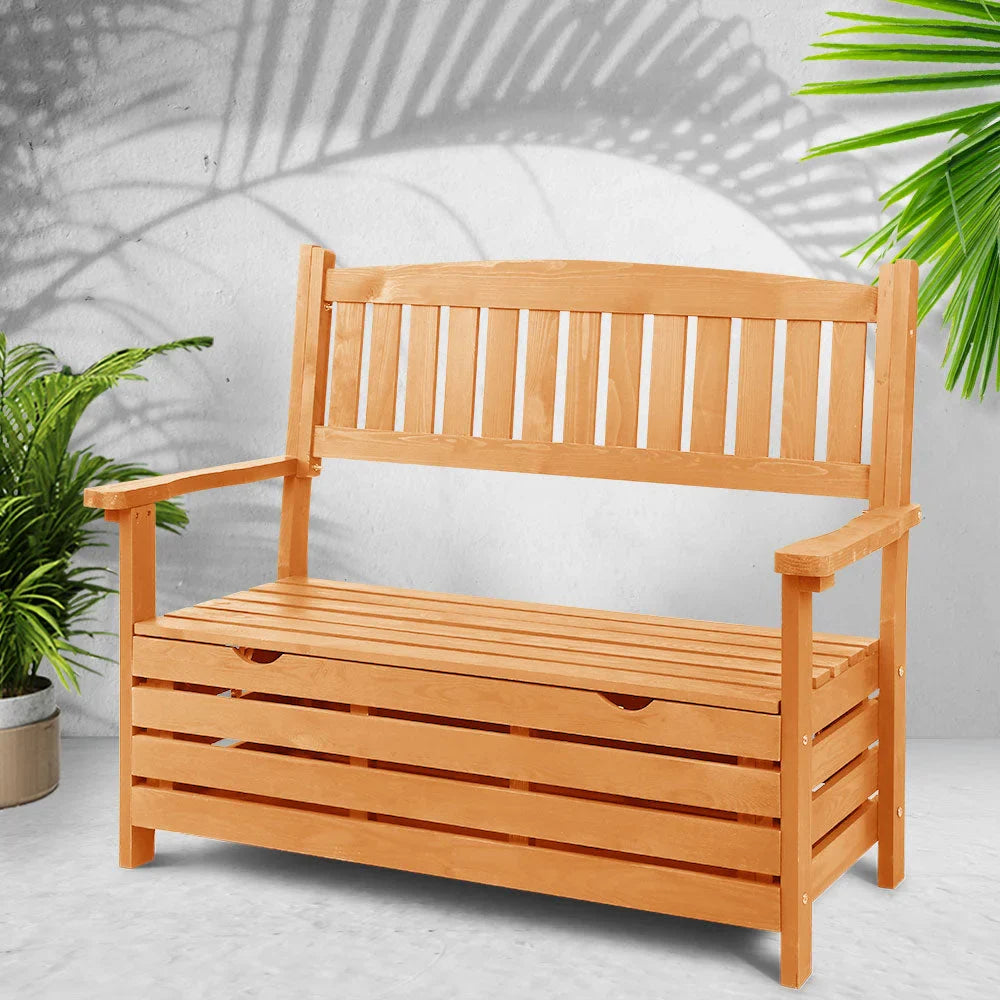
I cut the panels first, two long sides, two shorter ends, and a base. The key is keeping everything square so the box doesn’t wobble. Once I screwed the frame together, it already looked like something. Adding the base made it sturdy enough to sit on.
The lid was just another panel, cut to size and attached with hinges. Nothing complicated. I tested it a few times, opening and closing, making sure it didn’t scrape. If you’re worried about little fingers getting caught, you can fit gas struts so the lid opens slowly, but I went with simple hinges.
Sand, Paint, Protect
Raw timber outdoors won’t last long, so finishing matters. I spent a good hour sanding all the edges, especially the lid, so it felt smooth to touch. Then I sealed it with two coats of outdoor paint. I went with a muted grey to match my decking, but you could go natural with oil for a warm timber look, or even bright white for a crisp, coastal feel. The main thing is protection; sun and rain are brutal on untreated wood.
The First Time I Used It
The real payoff came that evening. My kids had dragged out half their toy collection, the cushions were all over the place, and I usually would’ve sighed at the thought of packing it up. Instead, I just lifted the lid, tossed everything in, shut it, and was done. The deck looked clear in seconds. I honestly wondered why I hadn’t built one sooner.
Now, a few months later, it’s become second nature. Pool gear goes in there. So do spare plant pots, gardening tools, and the odd soccer ball. It’s still just a bench to anyone looking at it, but to me, it’s a tidy little storage vault.
Lessons I Learned (So You Don’t Have To)
A couple of things I figured out along the way:
-
Ventilation matters. Drill a few small holes low down on the sides so air can circulate. Otherwise, things can get musty.
-
Don’t sit it flat on the soil. If your bench will live on grass, lift it a few centimetres off the ground with blocks or short legs. Keeps the base dry.
-
Bigger isn’t always better. I nearly went overboard on length, but a shorter bench looked more balanced in my space.
-
Cushions make a difference. A plain timber lid is fine, but add a cushion and suddenly it feels like “real” seating.
Why a DIY Storage Bench Is Worth It
Yes, you’ll spend a weekend cutting, screwing, sanding, and painting. But once it’s done, you’ll get years of use out of it. Unlike a generic plastic box, your bench becomes part of the space. It’s seating, storage, and a piece of furniture that feels like it belongs because you built it to belong.
More than that, it’s a project that gives back daily. Every time you sit on it, every time you stash something inside, it quietly makes life easier. And for me, that’s the best kind of DIY not just something to look at, but something that works hard without demanding attention.
Final Thoughts
If you’ve been thinking about an outdoor bench seat with storage DIY project, don’t overcomplicate it. At its core, you’re building a box with a lid. The details, timber type, paint colour, size, extras like struts or handles, those are where you add your own flair.
By the end of the weekend, you’ll have more than just a bench. You’ll have a seat that invites people to sit down, a hidden place to tidy away clutter, and a little daily reminder that sometimes the simplest projects are the most satisfying.
So grab a tape measure, sketch an idea, and give it a go. Chances are, a few weeks from now, you’ll be sitting on your handmade bench with a cup of tea, wondering how you ever lived without it.


